Technology
-

- New Releases
- Technology
Optimise your coworking space bookings and reporting with Nexudus floor plans
on July 10, 2025 -

- Commercial Real Estate
- Technology
How workplace management tools are revolutionising smart offices of the future
on May 16, 2025 -

- Coworking
- Technology
How to Boost Meeting Room Revenue in Your Coworking Space with Dynamic Pricing
Kate Tattersfield on May 9, 2025 -

- Technology
How NexEvents is transforming event management in coworking spaces
Carlos Almansa on May 7, 2025 -

- Coworking Resources
- Technology
Why a CRM is Essential for Coworking Spaces (And How to Choose the Best One)
A customer relationship management platform (CRM for short) is what organisations use to manage relationships and interactions...
Kate Tattersfield on April 10, 2025 -

- Coworking Resources
- Technology
How the Right Coworking Software Can Transform Your Coworking Space
We all know that technology solutions are imperative to the day-to-day running of your coworking space, but...
Lucy McInally on April 4, 2025 -

- New Releases
- Technology
New in Nexudus: Reduce no-shows & improve team bookings in your coworking space.
Meeting rooms are at the heart of collaboration in coworking spaces. Whether it's a brainstorming session, a...
Carlos Almansa on March 21, 2025 -

- New Releases
- Technology
Unlock New Revenue Streams with Our New Virtual Offices Module
The popularity of remote and hybrid working has prompted many organisations to rethink the way they utilise...
Kate Tattersfield on March 18, 2025 -

- Coworking News
- Coworking Resources
- Technology
ViDA Compliance Guide: 8 Essential Steps for Coworking Spaces in the EU
Now that 2025 has arrived, the European Union's VAT in the Digital Age (ViDA) initiative is becoming...
Marc Navarro on March 13, 2025 -

- Coworking News
- Coworking Resources
- Technology
Harnessing AI to Help Coworking Operators Understand Their Communities Better
After more than twelve years in the coworking industry, we’ve seen the movement evolve at an incredible...
Adrian Palacios on March 7, 2025 -

- Community
- Coworking Resources
- Technology
What Is Workplace Management and Why Does It Matter?
There has always been a need for workplace management – the process of organising and optimising physical...
Lucy McInally on March 6, 2025
In the webinar we recently celebrated, we walked you through every step of the Nexudus Floor Plan Editor—drawing walls to exact measurements, linking desks and meeting rooms to their resources, and overlaying live occupancy data right inside the Admin Panel. That half-hour session showed how an accurate, data-rich blueprint feeds directly into smarter reporting and forecasting.
Here’s a detailed guide that distils everything we covered, so you can start turning your floor plans into actionable insights today.
The new in-built floor plan editor allows you to create and refine floor plans from scratch directly within the Admin Panel. Because you can draw every wall and fixture to exact measurements, Nexudus can precisely calculate how much revenue each square metre of your building generates.
If you connect occupancy or environmental sensors to Nexudus, you can overlay live data directly on top of the floor plan.
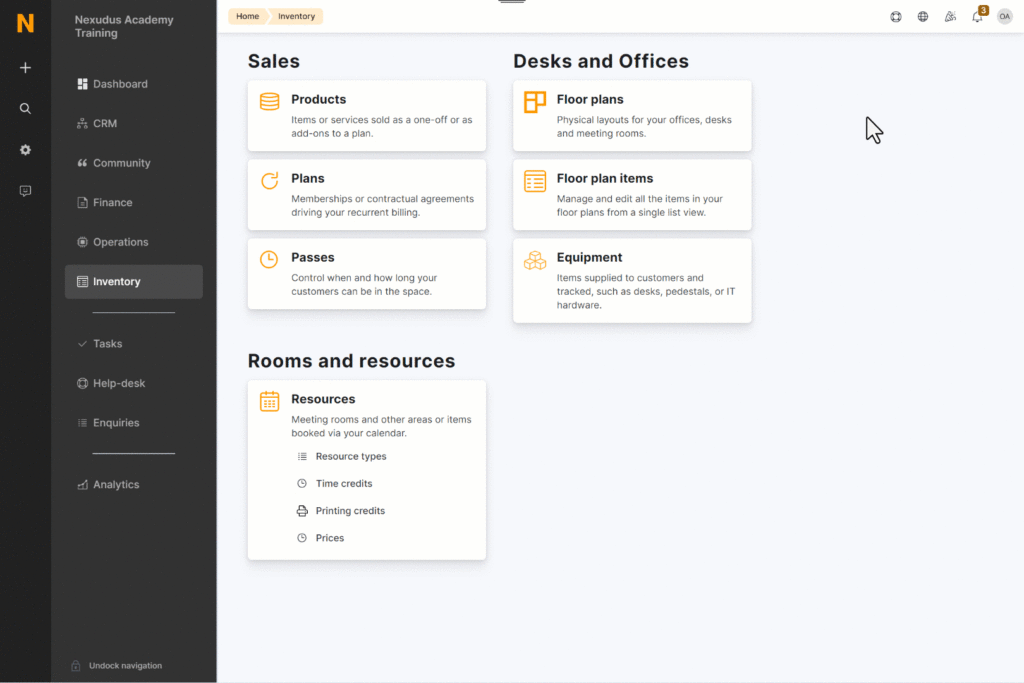
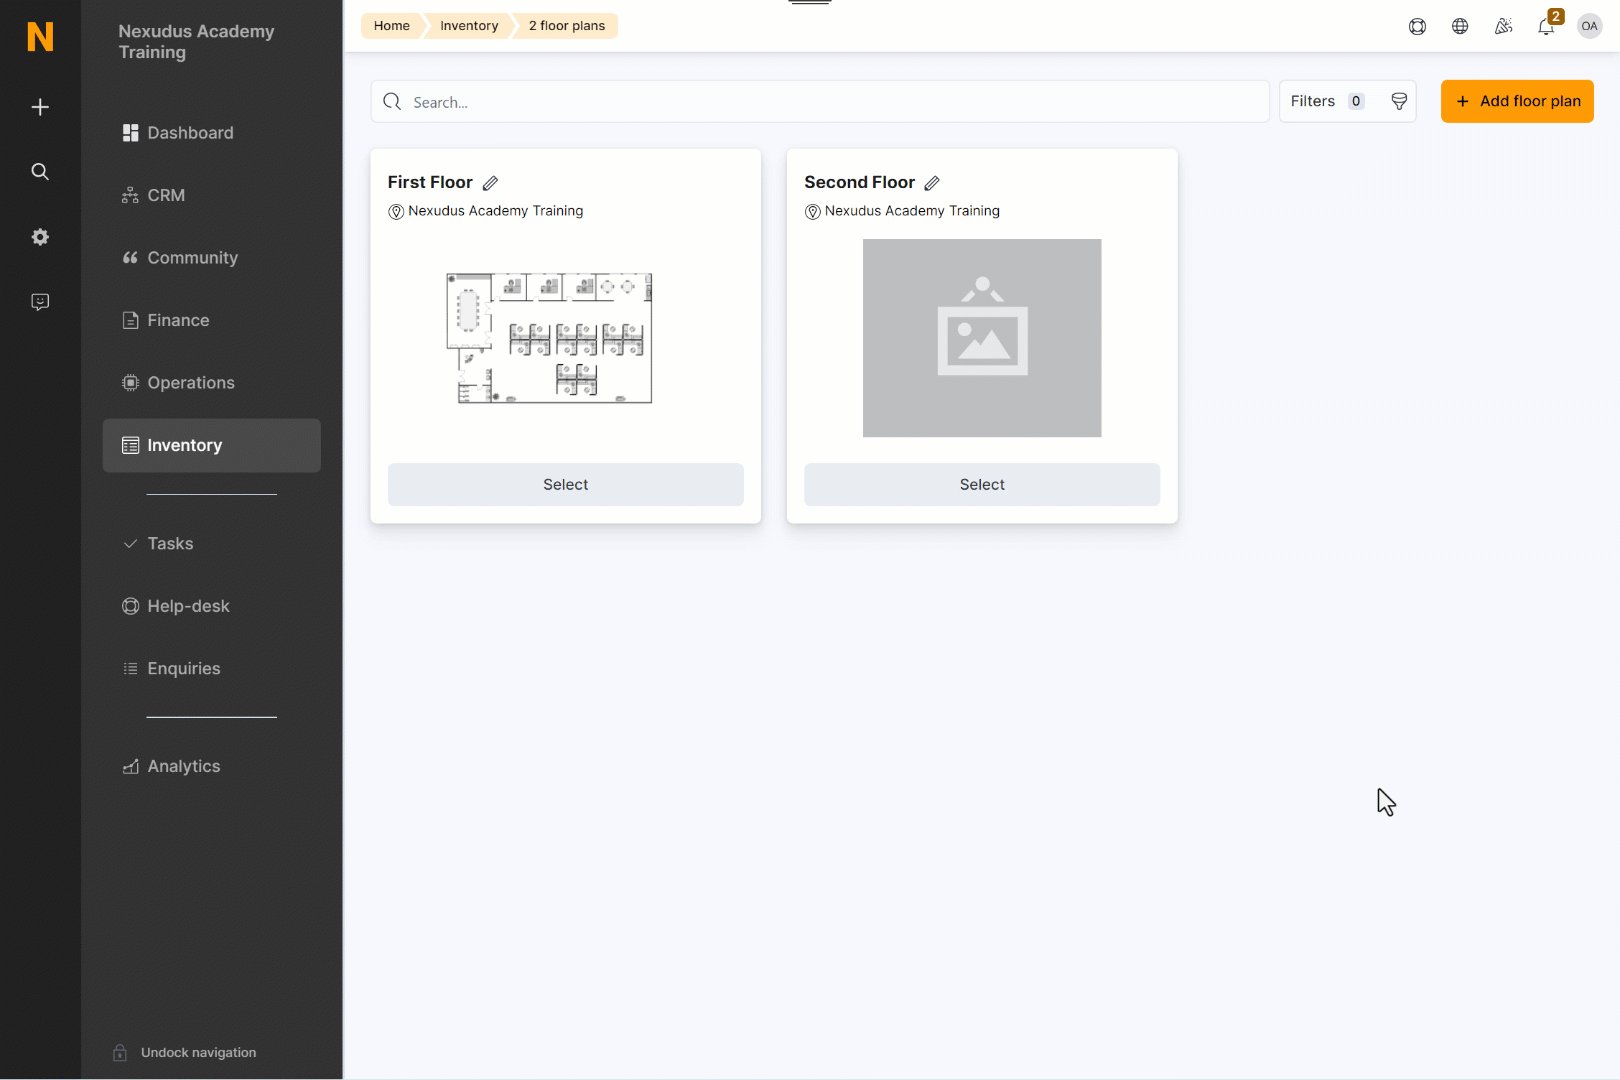
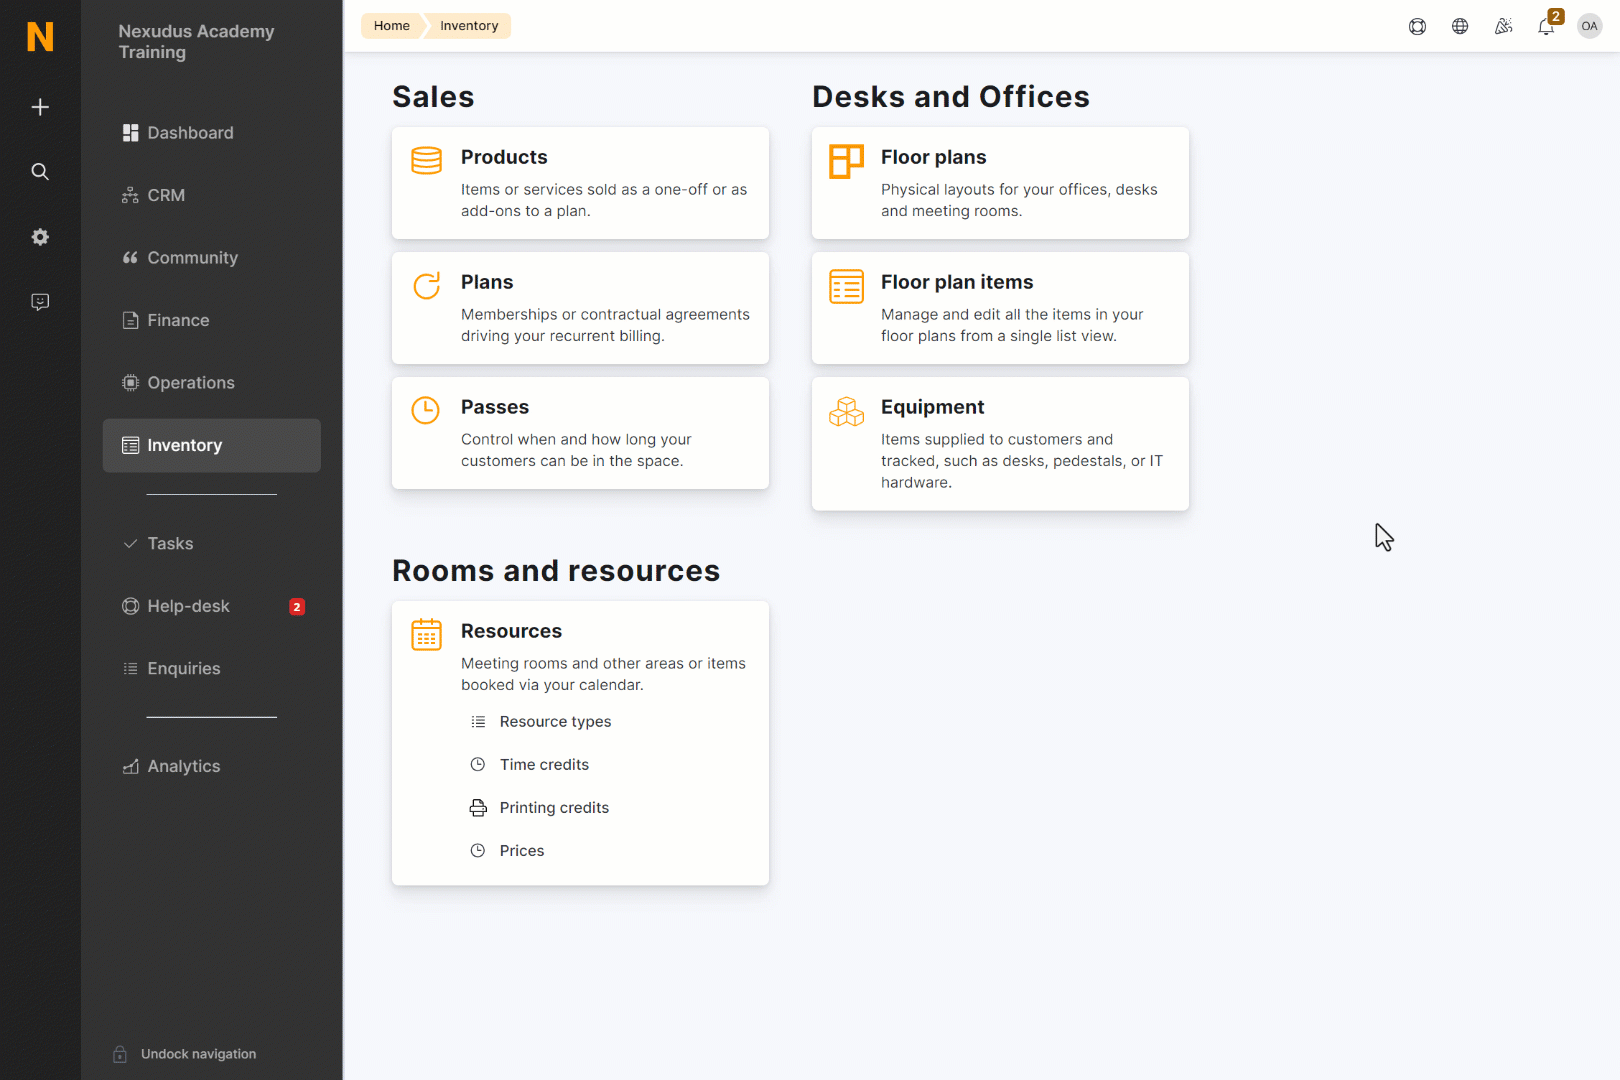
Create a floor plan
- Go to Inventory › Floor plan and click + Add floor plan.
- Enter a name for the plan.
- Enable Use the Nexudus Floor Plan Editor to manage this floor plan.
- Click Save changes.
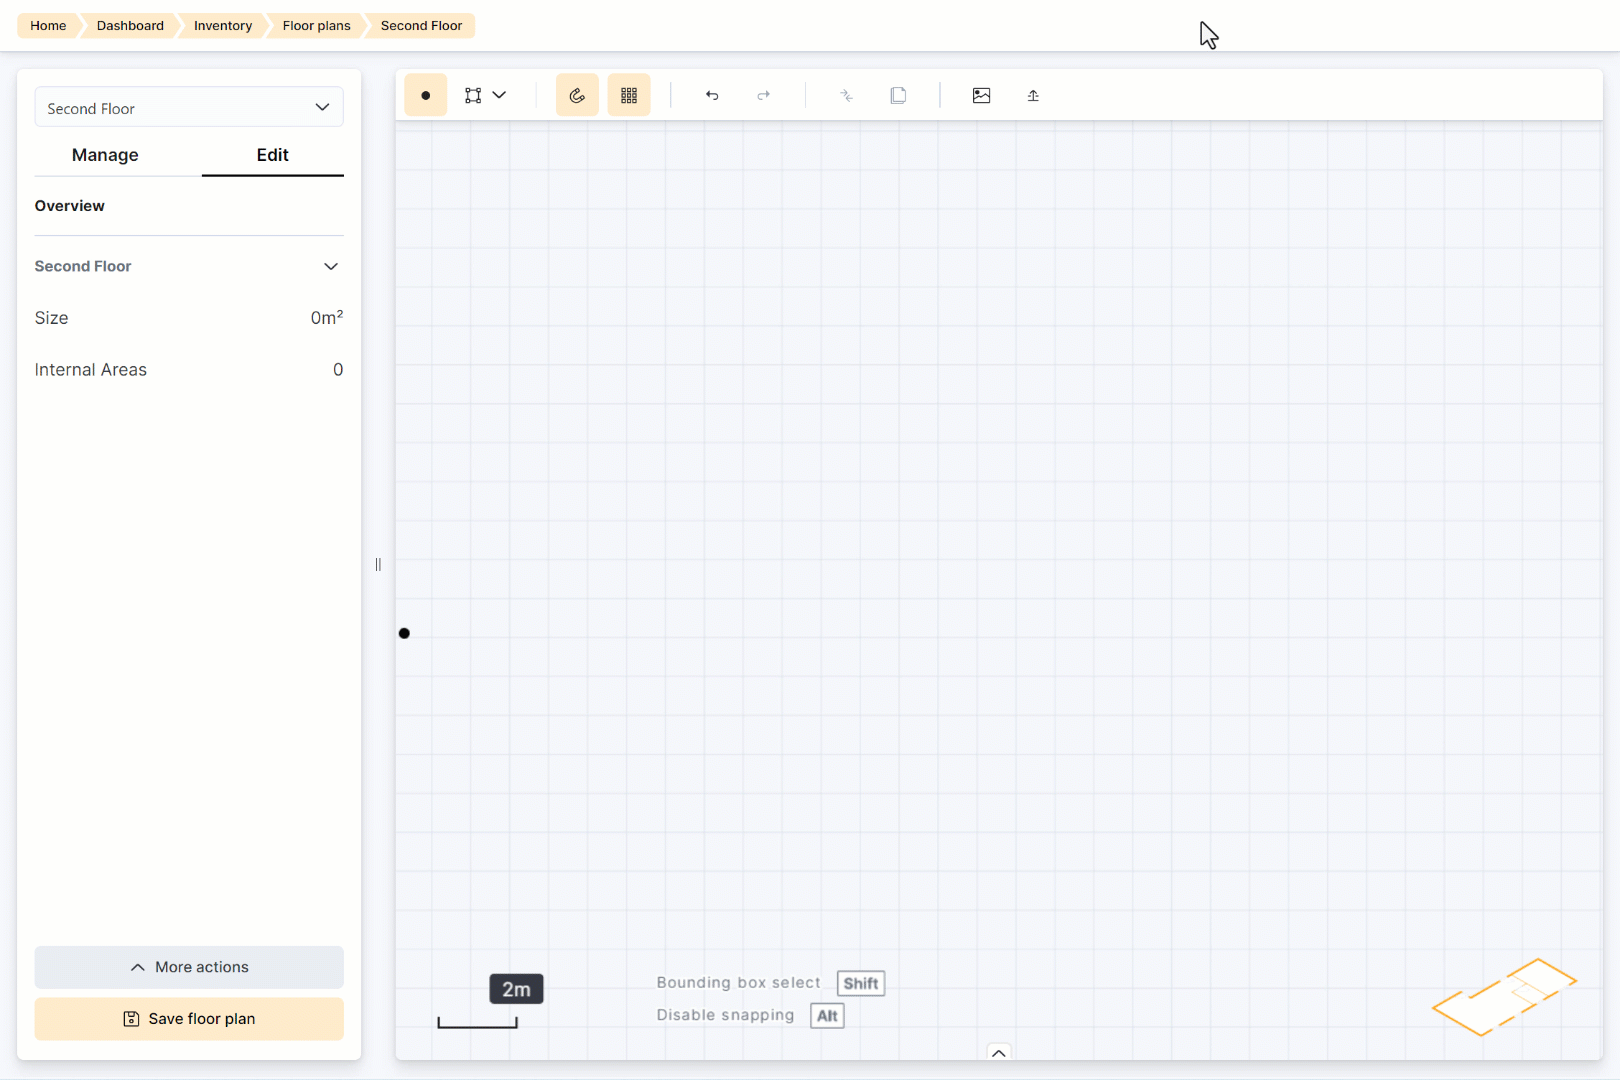
Edit the floor plan
Open the new (blank) plan and select the Edit tab to start drawing.
Add a tracing image (optional)
- Click More actions › Tracing image.
- Select an image file.
- Use the scale bar to resize it. (Tip: measure at least one real-world wall and draw it first so you can scale the tracing image accurately.)
- Toggle the image icon to hide or show the tracing overlay at any time.
Draw walls and other components
- Click the building-components icon.
- Choose Wall.
- Click inside the editor and drag to the desired length.
- Repeat for additional walls.
Hold Shift while dragging to keep a wall perfectly straight.
To add partitions, windows, doors, furnishings, stairs, lifts, etc., repeat the steps above but pick the appropriate component. When you choose Furnishing, first pick the specific item (e.g., chair, table) in the left-hand panel.
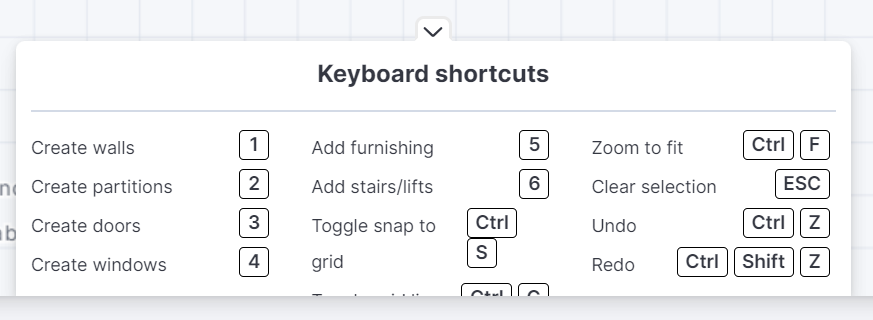
Use the keyboard-shortcut list (arrow at the bottom of the editor) to speed things up.
Things you can tweak:
- Select a door to change its type, swing direction, or hinge side.
- Click any enclosed area to give it a name and background colour, then Save floor plan.
- Upload a customer-visible background image via More actions › Background image.
- Rename the plan with More actions › Change floor plan information.
Remember to click Save floor plan regularly.
You can also use keyboard shortcuts to add building components to the floor plan. Click the arrowhead at the bottom of the editor to see the list of shortcuts.
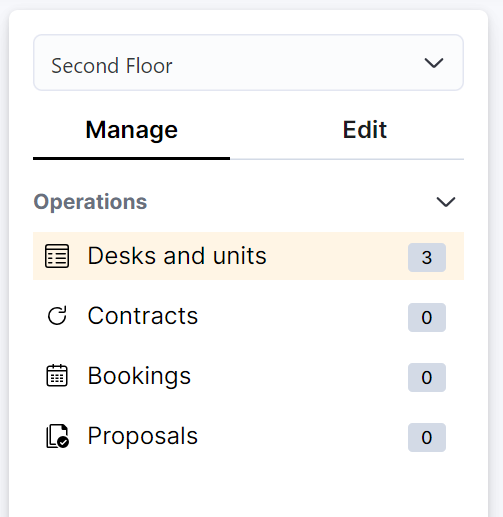
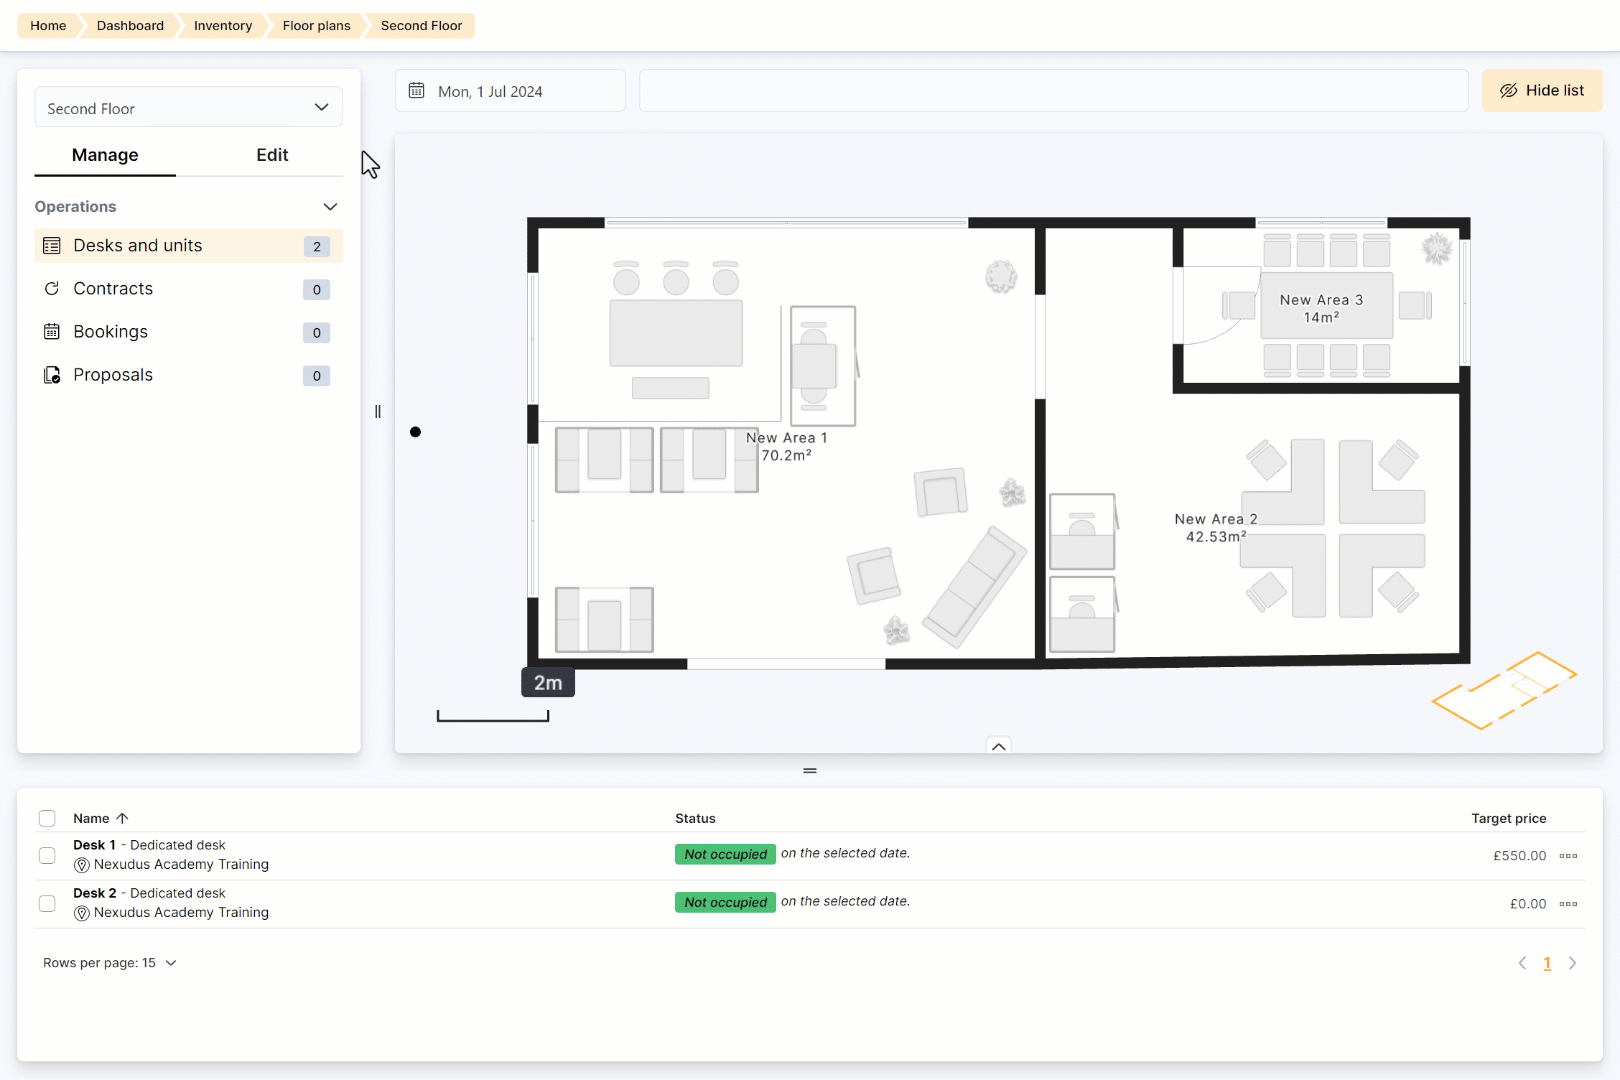
Manage floor-plan items (rooms, desks, etc.)
Switch to the Manage tab to link areas on the drawing to actual Nexudus units:
- Click an area on the plan.
- In the sidebar that opens, either:
- Use existing unit – pick a unit from the drop-down list, or
-
- Create a new unit – enter a name, choose a type and status, and (if needed) link it to a resource.
- Click Save changes.
Here you can also see whether an item is part of a contract, proposal, or booking.
Migrate an old floor plan
You can bring legacy plans into the new editor:
- In Inventory › Floor plans, select the old plan.
- Choose More actions › Migrate.
- A copy with “migrated” in the name appears. Open it in the new editor.
The original plan image is loaded as a tracing image. Scale it, redraw accurate walls, and reposition units/desks as needed. When you finish, click Save floor plan.
Explore and experiment
Spend some time in a demo account to get comfortable with the editor—there are plenty of features beyond what’s covered here.
If you have any questions or need help getting started, please reach out to our Support Team—we’re here to help.