NexIO v2
With version 2 of NexIO, we’ve redesigned the UI and customer workflows and some new features have been added, such as a calling feature and QR code authentication.
Let’s take a look at the updates!
NexIO settings in the Admin Panel
Before looking at the app it is important to understand the settings that have changed in the Admin Panel. In Settings > Companion apps > NexIO, some settings were renamed so they are easier to understand and some new settings have been added.
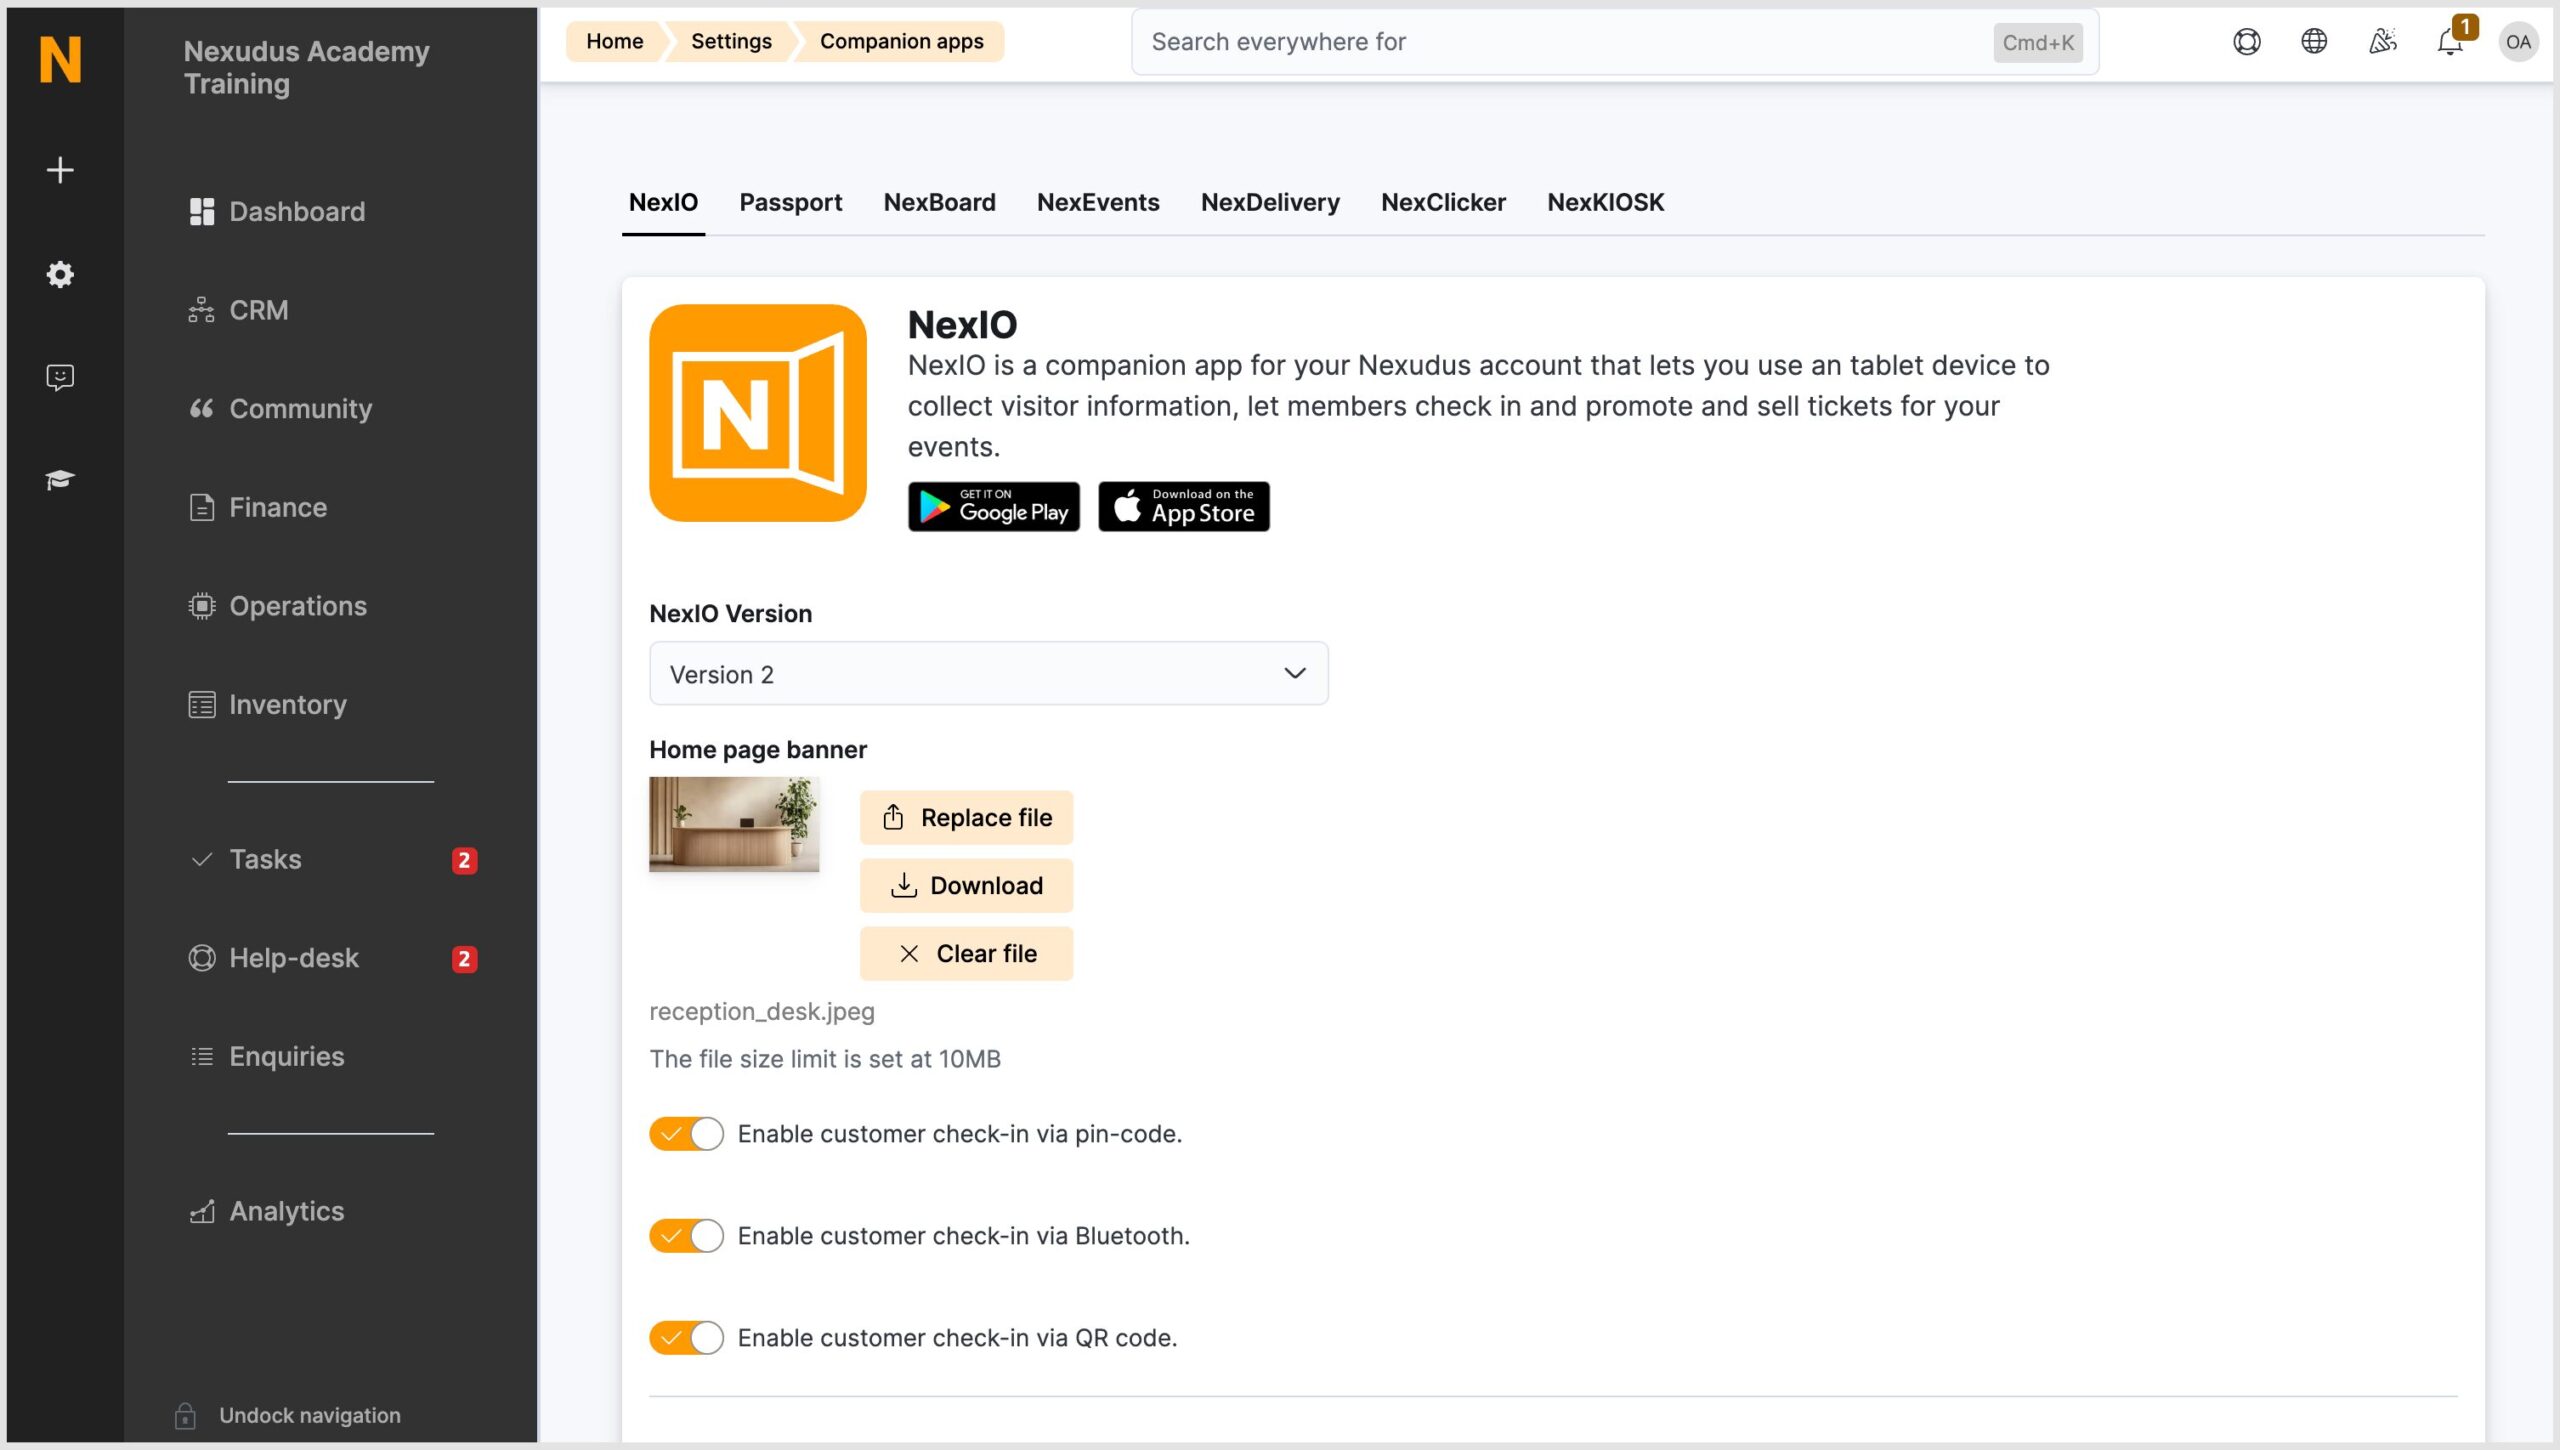
Select Version 2 from the drop-down list to see the latest NexIO app settings.
New settings include:
- Enable customer check-in via QR code – This allows members to check in using a QR code.
- Enable visitor check-in via QR code – This allows visitors to check in using a QR code.
- Let visitors search customers across all locations – This allows you to determine whether visitors can search for their host (aka your members) across all your locations or just the location the device is registered to.
- Enable Deliveries section – This allows couriers to register deliveries from the NexIO app. When this setting is disabled, the delivery option will be removed from the NexIO home screen.
- Show capacity section – This allows you to display your space’s capacity on the NexIO home page.
- Allow couriers to contact members via VOIP – This allows couriers to voice call a member via NexIO.
- Allow couriers to contact reception via VOIP – This allows couriers to voice call the reception via NexIO.
Home screen banner – By default, NexIO uses the same banner as the Members Portal, however, you can upload a different banner for the NexIO app.
Language tokens
You can use language tokens to customise some of the text displayed on the app. The language tokens are available in English, French, German, Italian, Portuguese and Spanish.
See the Knowledge Base for information on adding language tokens.
Setting Up NexIO
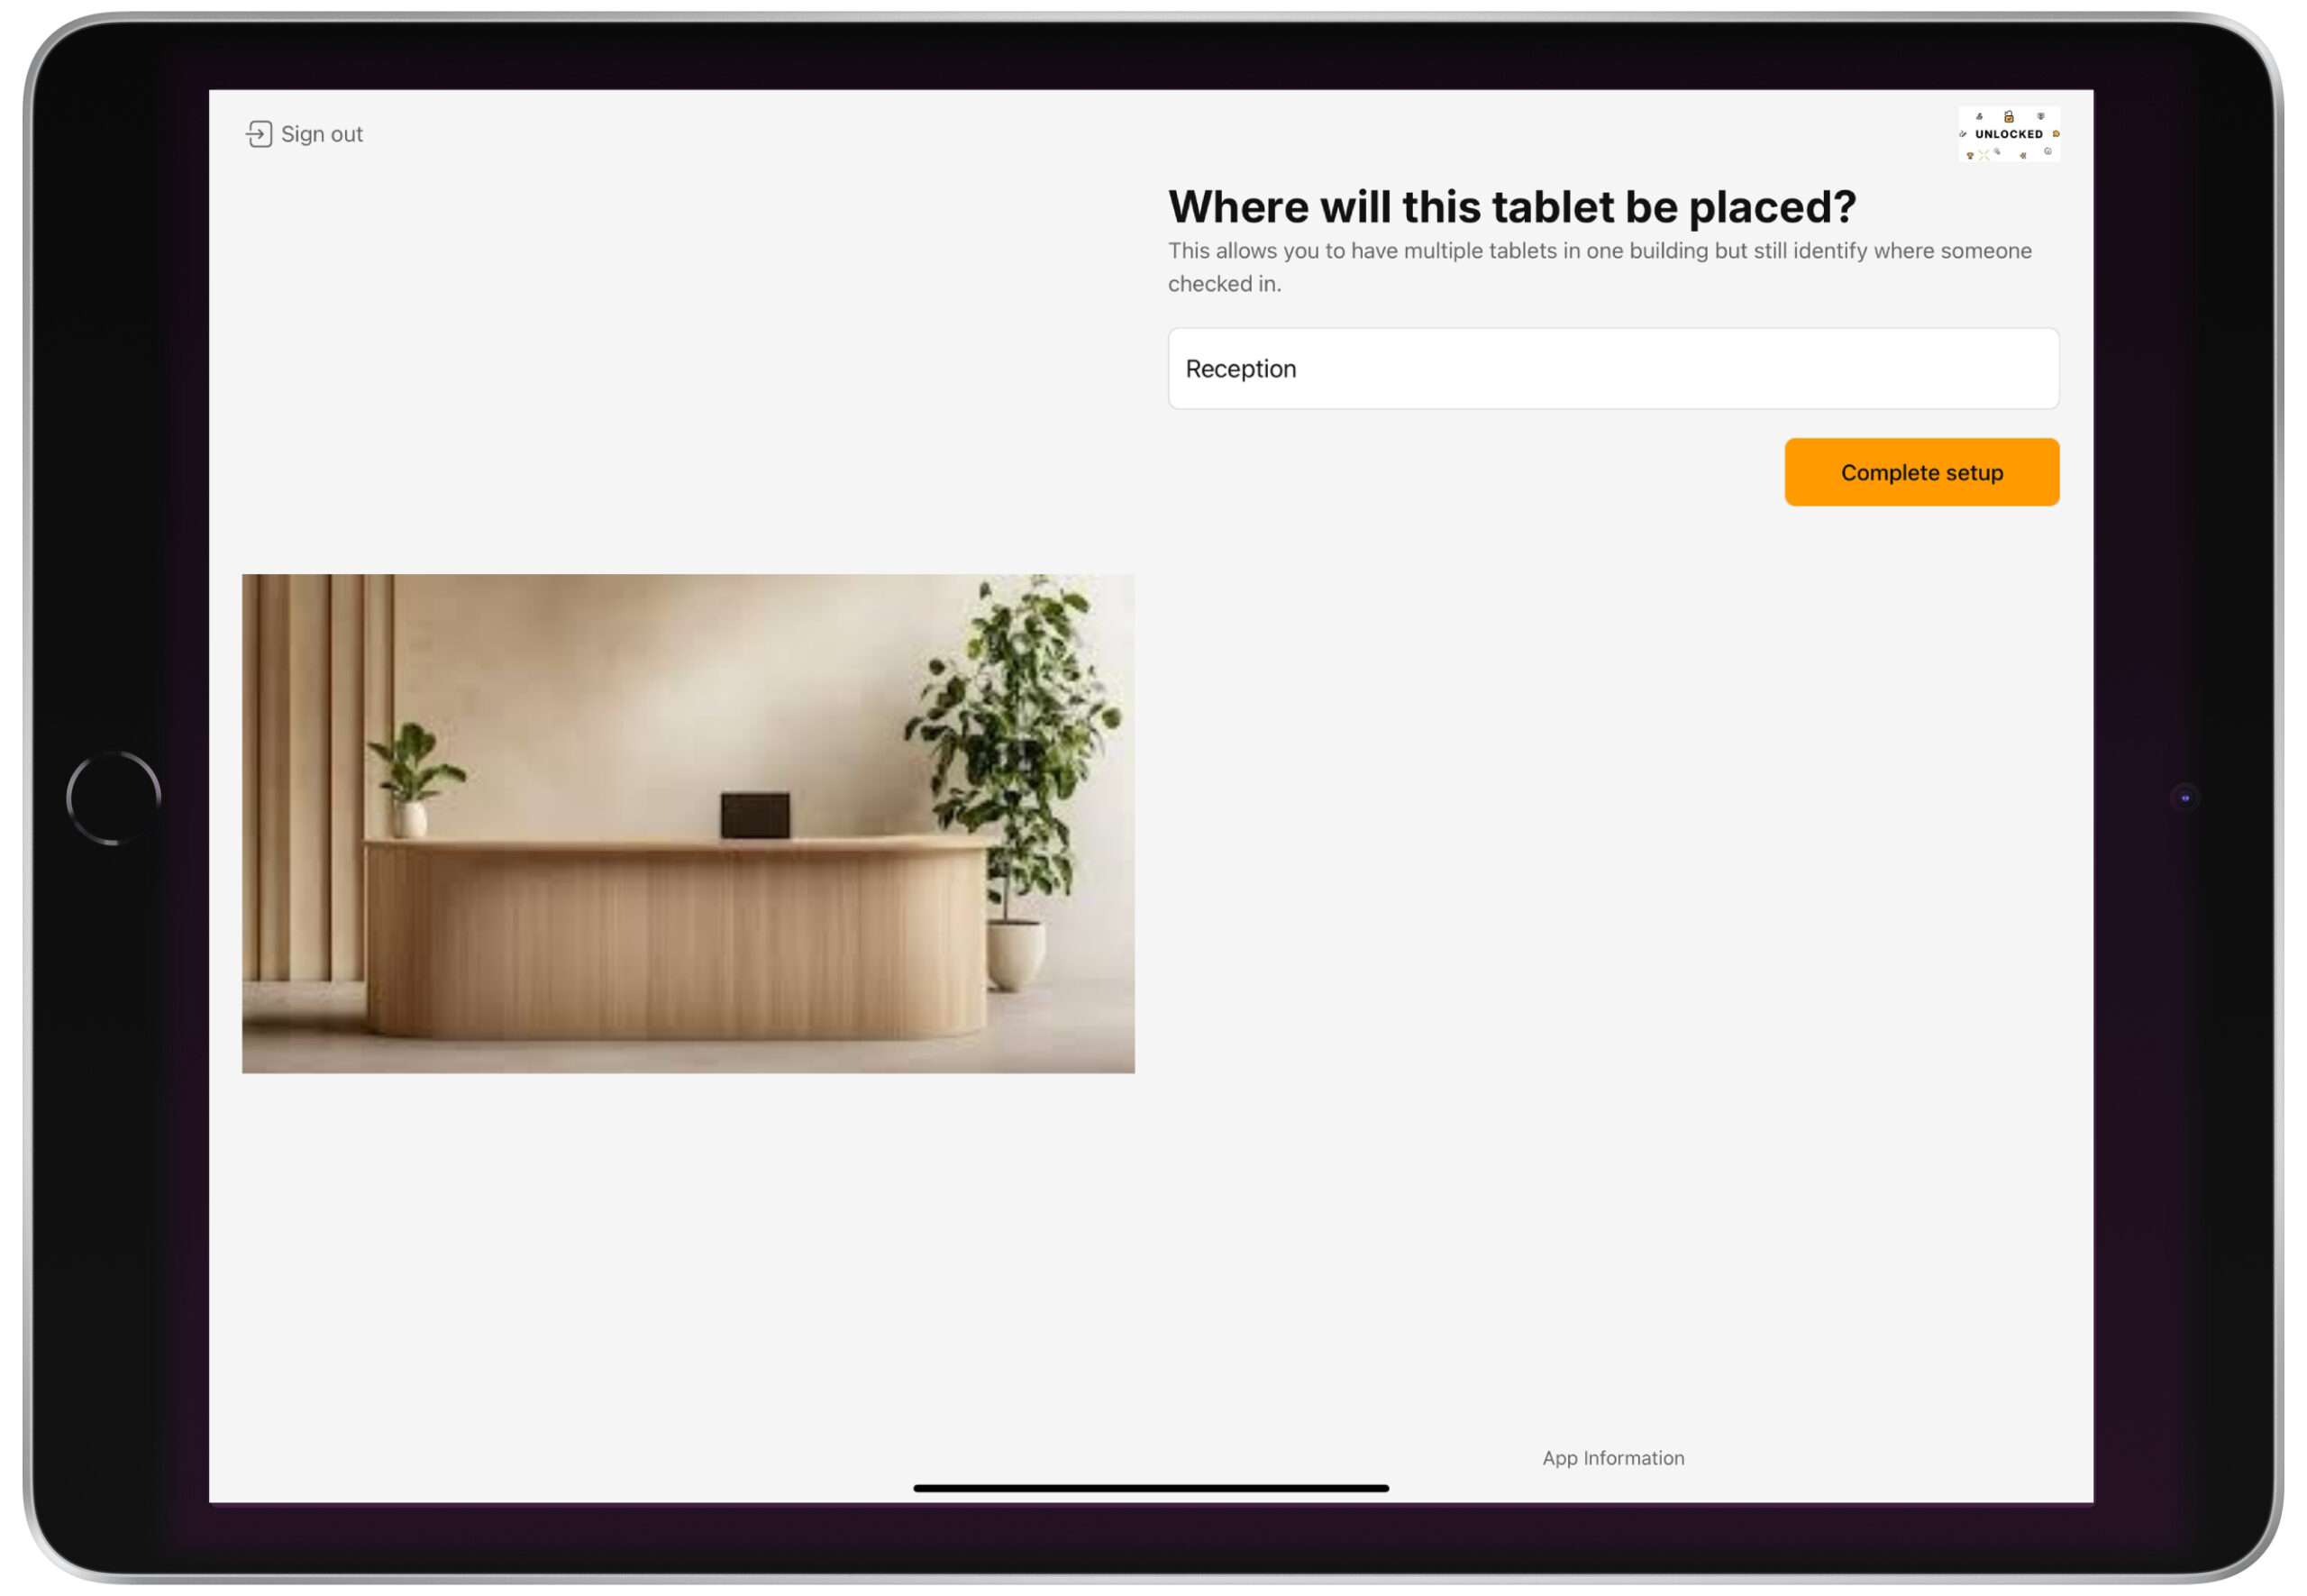
The initial steps to set up NexIO haven’t changed, however, there is an additional step at the end of the process to specify where the tablet will be physically located (e.g. Lobby or Reception). This will help customers who have multiple NexIO tablets in their space easily identify where a member or visitor checked in or where a courier left a package.
See the Knowledge Base for more information on setting up NexIO.
Twilio Integration
We now have an integration with Twilio which is a cloud-based communications company. The Twilio integration allows couriers to either call the parcel recipient or the office reception from the NexIO app.
Please note: this integration is only available to our UK customers and you cannot make international calls.
The integration works in the system background, so you do not need to enable this integration from the Admin Panel.
Deliveries
On the NexIO app, there is now a function for couriers delivering parcels to voice call the customer or reception or simply register the delivery.
The option to voice call the customer or reception will only appear if the settings are enabled in the Admin Panel and if there are phone numbers registered on the relevant account:
- The Reception phone number is taken from the Reception phone number field in Settings > Companion Apps > NexIO.
- The customer’s phone number is taken from the Cell / Mobile field in their customer record.
- On the home screen, tap Deliver packages.
- Search for the customer and tap on their name.
If the customer cannot be found, tap Leave package anyway or Call reception. - Once the customer has been selected, there will be a few options:
- Call [Customer name]
- Call reception
- Do not deliver – If this option is selected, the user will be taken back to the app home screen.
- Leave package – If this option is selected, the system will automatically register the delivery in the Admin Panel and send the customer an email. The delivery record status will be ‘Pending collection’.
If the call to the customer or reception was accepted or the call went to voicemail, the user will need to choose one of the following options:
- I’m leaving the package nearby – This option automatically registers the delivery as ‘Pending collection’ in the Admin Panel and sends the customer an email. The user will then see a confirmation screen.
- Yes – This option automatically registers the delivery as ‘Collected’ in the Admin Panel and sends the customer an email. The user will then see a confirmation screen.
- No, I can’t deliver it– This option automatically takes the user back to the app’s home screen.
If no voicemail is set up on the receiver’s phone, the call will time out in less than 1 minute. The user will see a ‘The person is currently unavailable’ message on the NexIO app.
If the call wasn’t accepted or the line was busy, the user will see a ‘The person is currently unavailable’ message and will be redirected to the customer record.
Visitors can also use a QR code to check in and out on the NexIO app. They can find this QR code in the registration email they’ve received.
Member Check-In
You members can check in using a QR code, PIN code or by tapping their phone with the Passport app logged in near the NexIO tablet. As an admin, you can enable or disable these options via Settings > Companion apps > NexIO in the Admin Panel. When an option is disabled, it will not be visible on the NexIO app.
- Tap Check-in on the home screen.
- Tap Yes, I am a member.
If visitor check-in is disabled, this step will be skipped. - The member can choose either to:
- Scan their QR code which they can find on the Passport app by clicking the three dots and then QR Authenticate.
- Check in with their PIN code which can be found on the My Profile section on the Passport app or the Security section on the Members Portal.
If the member forgets their PIN code, they can tap I forgot my PIN. Send me a reminder. They will be asked to enter their email address. If the email address matches a customer record, a reminder email will be sent.
When the check-in is successful, the member will see a confirmation message.
Visitor Check-in
If a visitor was pre-registered, they can check in using a QR code or PIN code on the NexIO app.
- Tap Check-in.
- Tap No, I am a visitor.
If member check-in is disabled, this step will be skipped. - The user can choose either to:
- Scan their QR code which can be found in their visitor registration email.
- Check in with the PIN code which can also be found in their visitor registration email.
When the registration is successful, the user will see a confirmation message.
Visitor Registration
Provided the Enable the visitor self-registration forms setting is enabled in the Admin Panel, visitors can also register themselves using NexIO.
- Tap Check-in.
- Tap No, I am a visitor.
- Tap Register as a visitor.
- The user will need to enter their details.
In the Who are you visiting field, the visitor can search for their host.
Note: As an admin, you can control which fields appear in this form via Settings > Companion apps > NexIO > Form Fields. - Tap Register.
When the registration is successful, the user will see a confirmation message.
Want to know more about
how Nexudus could help your business?
We’re here to answer any questions you have.