NexEvents v2

With version 2 of NexEvents, we’ve added new modes, new functionality and greatly improved design based on user feedback.
These changes will bring improvements to the member experience when they attend your events.
Let’s go through a rundown of the updated version of the app, showcasing those new features.
New modes
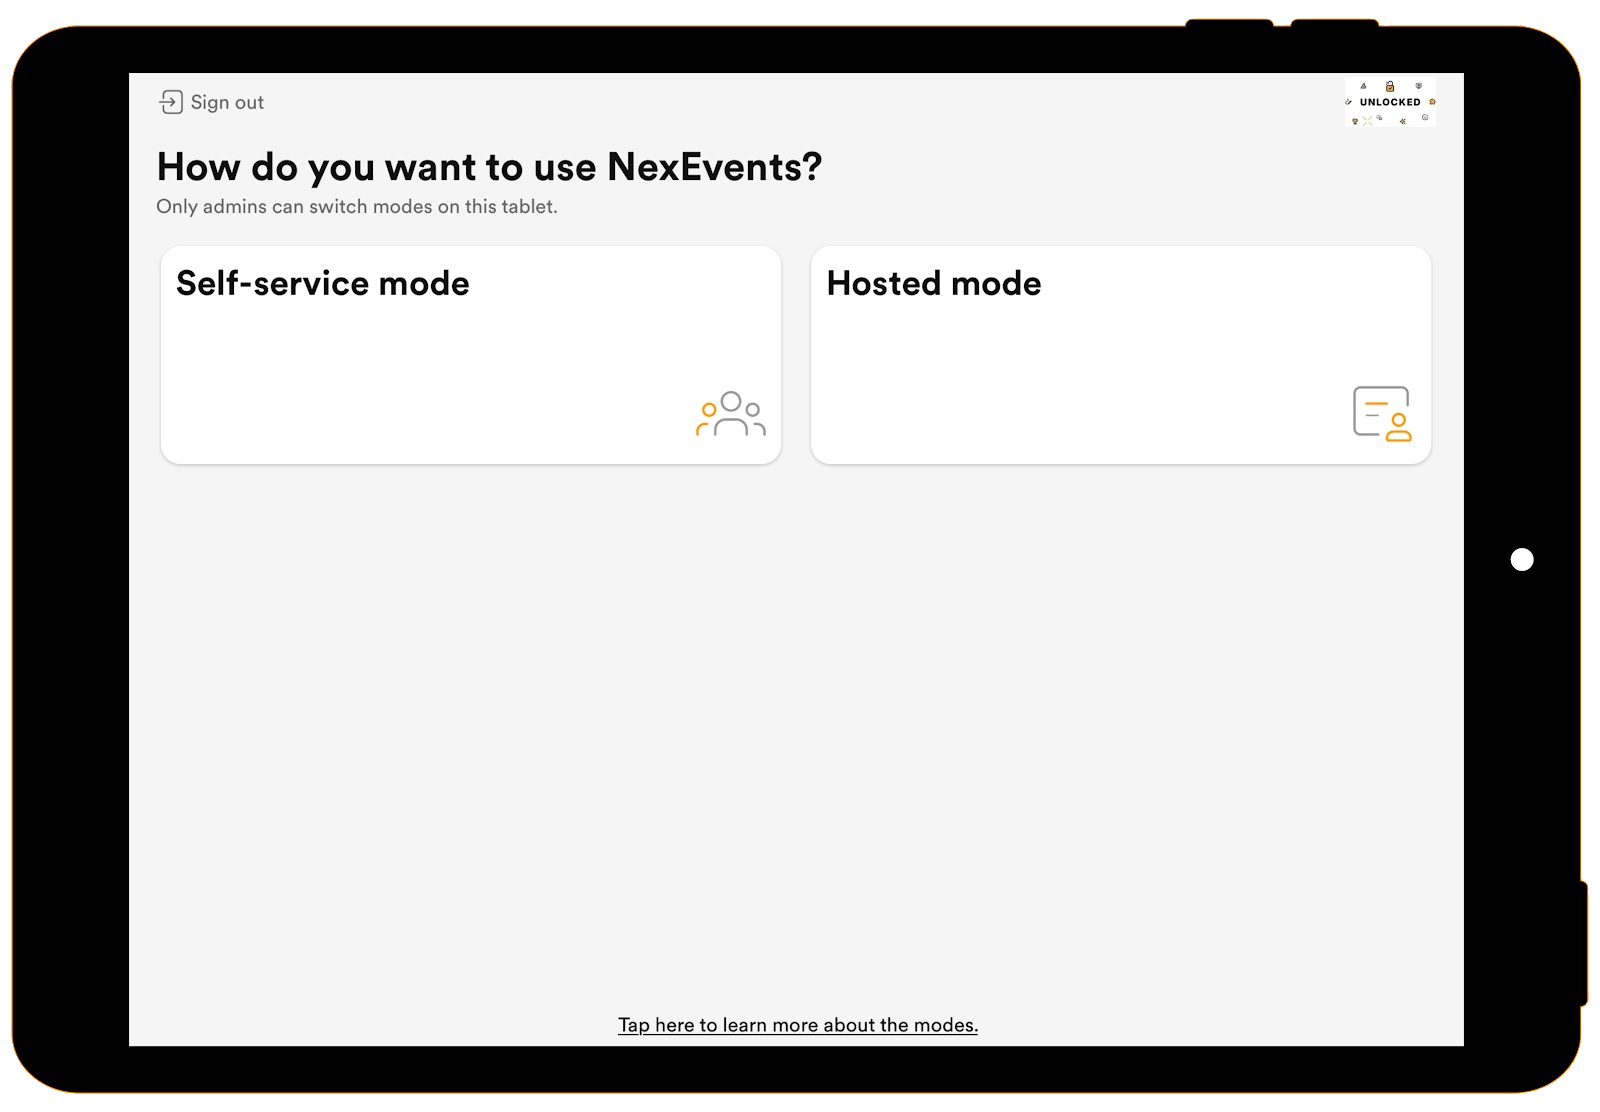
First up, we now have two modes within the NexEvents app. These are self-service mode and hosted mode.
As an admin, when you log in to the app, you’ll first be asked to select a location, before being prompted to choose which mode is to be used.
Self-service mode will let attendees scan their tickets and check themselves into events, without help from staff.
Hosted mode lets you scan your attendees’ tickets or search manually for attendees to check them in manually. In hosted mode, you are also able to add new attendees, when the event has zero-cost tickets available.
Self-service mode
Let’s take a look through the self-service mode first.
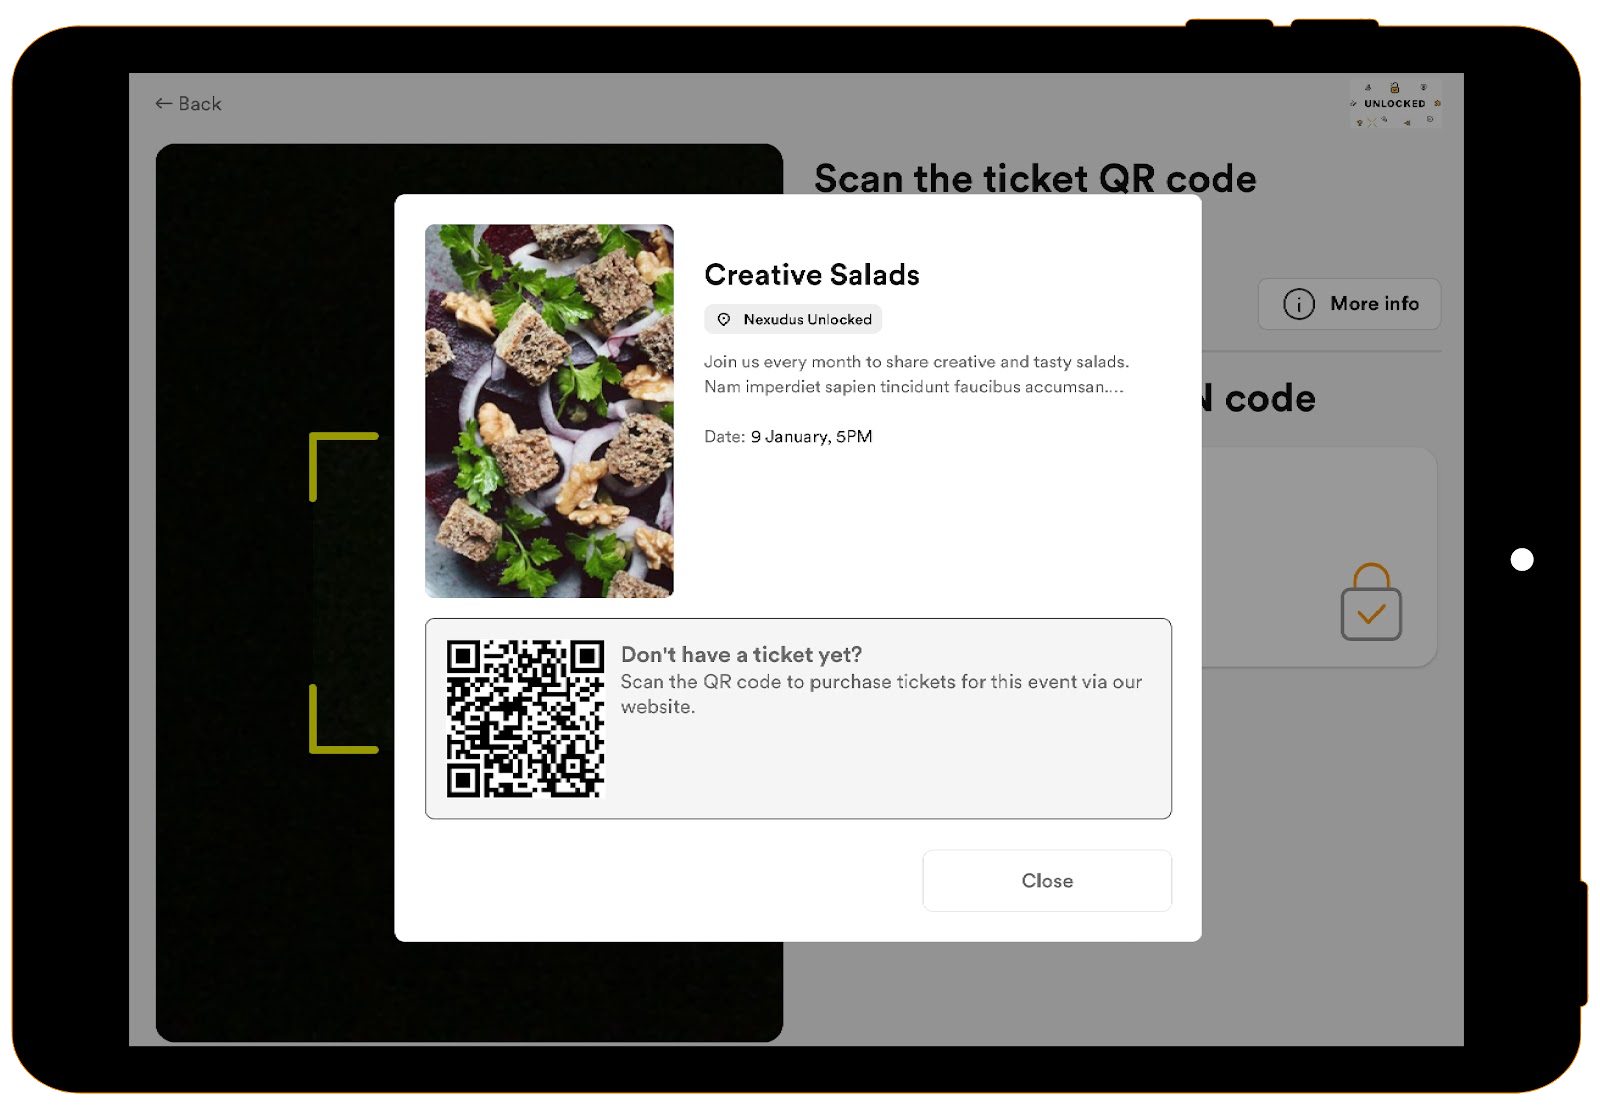
Attendees will be able to see all upcoming events taking place that day. By choosing the event they’re attending, they’ll then be prompted to scan the QR code that they would have received in their event ticket email. They are also able to select the manual ‘Pin Entry’ option, where they’ll be able to enter the pin received within the event ticket email.

Whichever method they use to check in, they’ll be able to tap the Scan another ticket button, to check in more attendees if required.
Behind the More info button, will be some details on the event, and a QR code. Scanning this QR code will take the visitor to the Members Portal to purchase a ticket for the event.
Hosted mode
Now, on to hosted mode.
When in hosted mode, you, as an admin, will be presented with a screen that shows the event details, the number of attendees currently checked in, an option to add attendees, and also options to check in attendees.
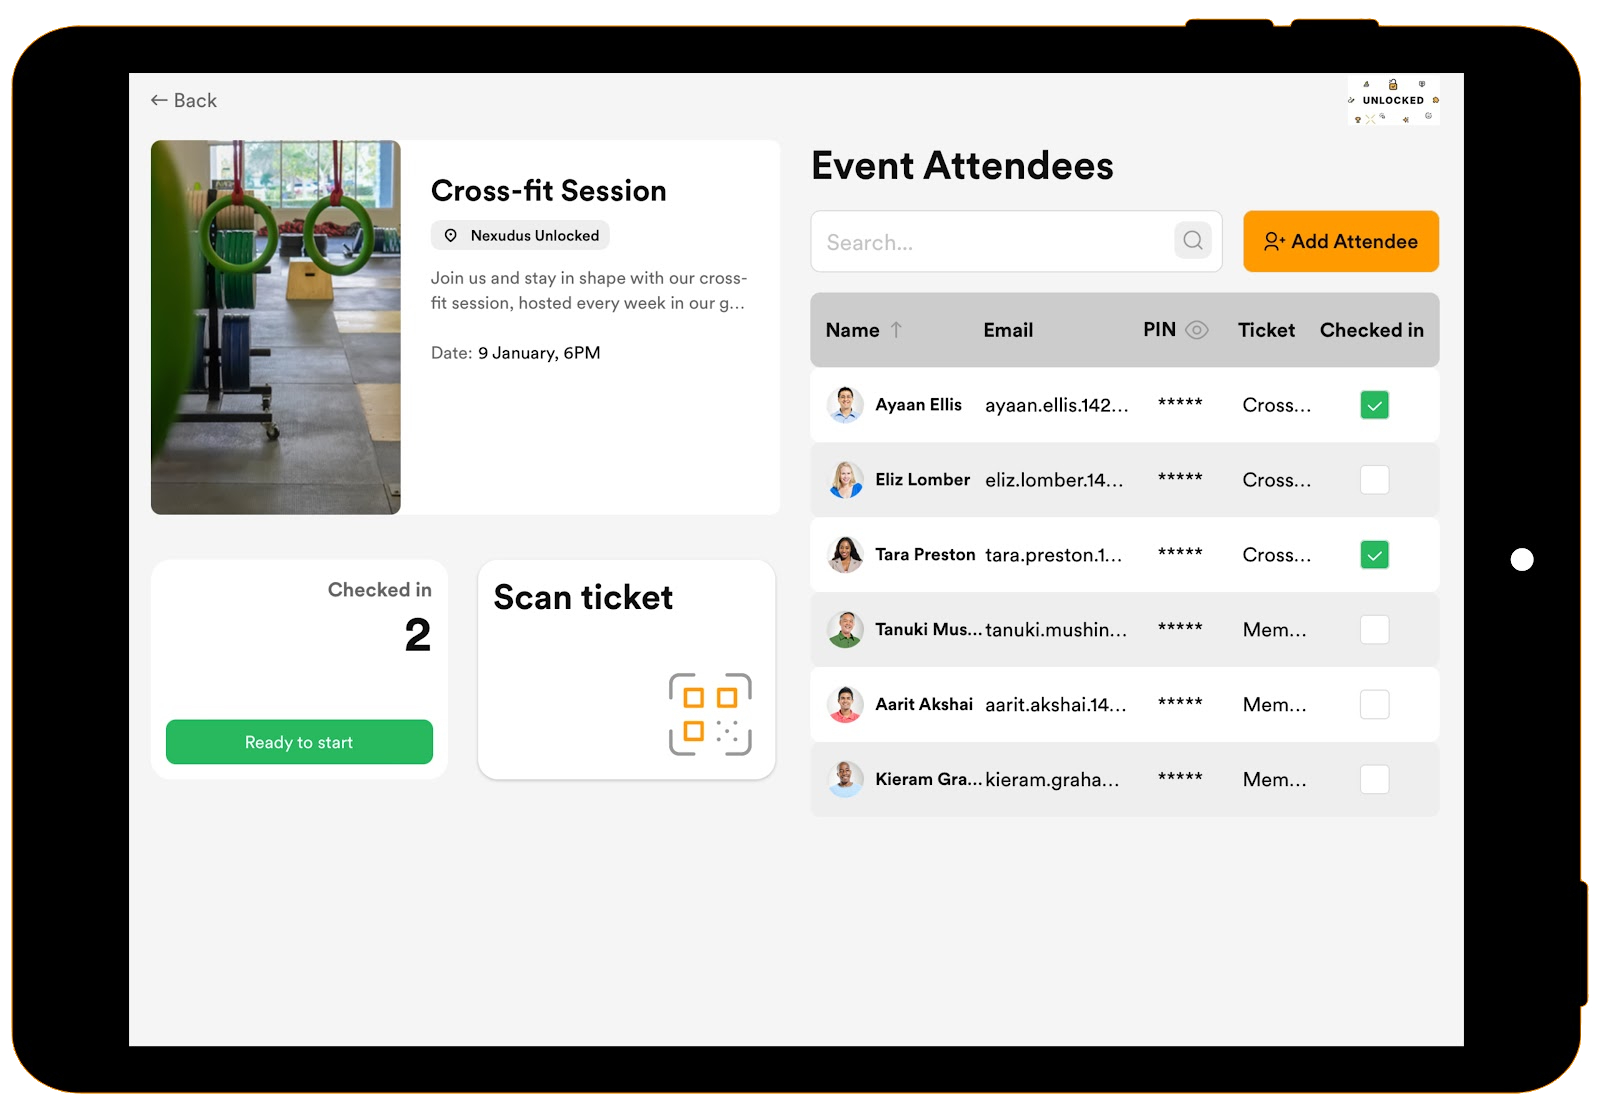
Focussing on these check-in options, we can make use of a few different methods. The first of these is the scan ticket mode, which allows you to either scan the QR code of the attendees ticket, or to enter the PIN code included with the ticket.
Next, we have the manual check in mode in which you would search for the attendee from a list and use the checkbox to check in the attendee. Choosing this option will prompt you to physically check the ticket of the customer, as you would not be scanning the QR code or using the PIN code from the event ticket email.
This method can also be used to ‘uncheck’ an attendee from the event. This will check them out of the event and the attendee would be reflected in the reports as ‘Not checked in’.
Therefore, this function should only really be used if there was a mistake with check-in, as no record of checking in will be recorded.
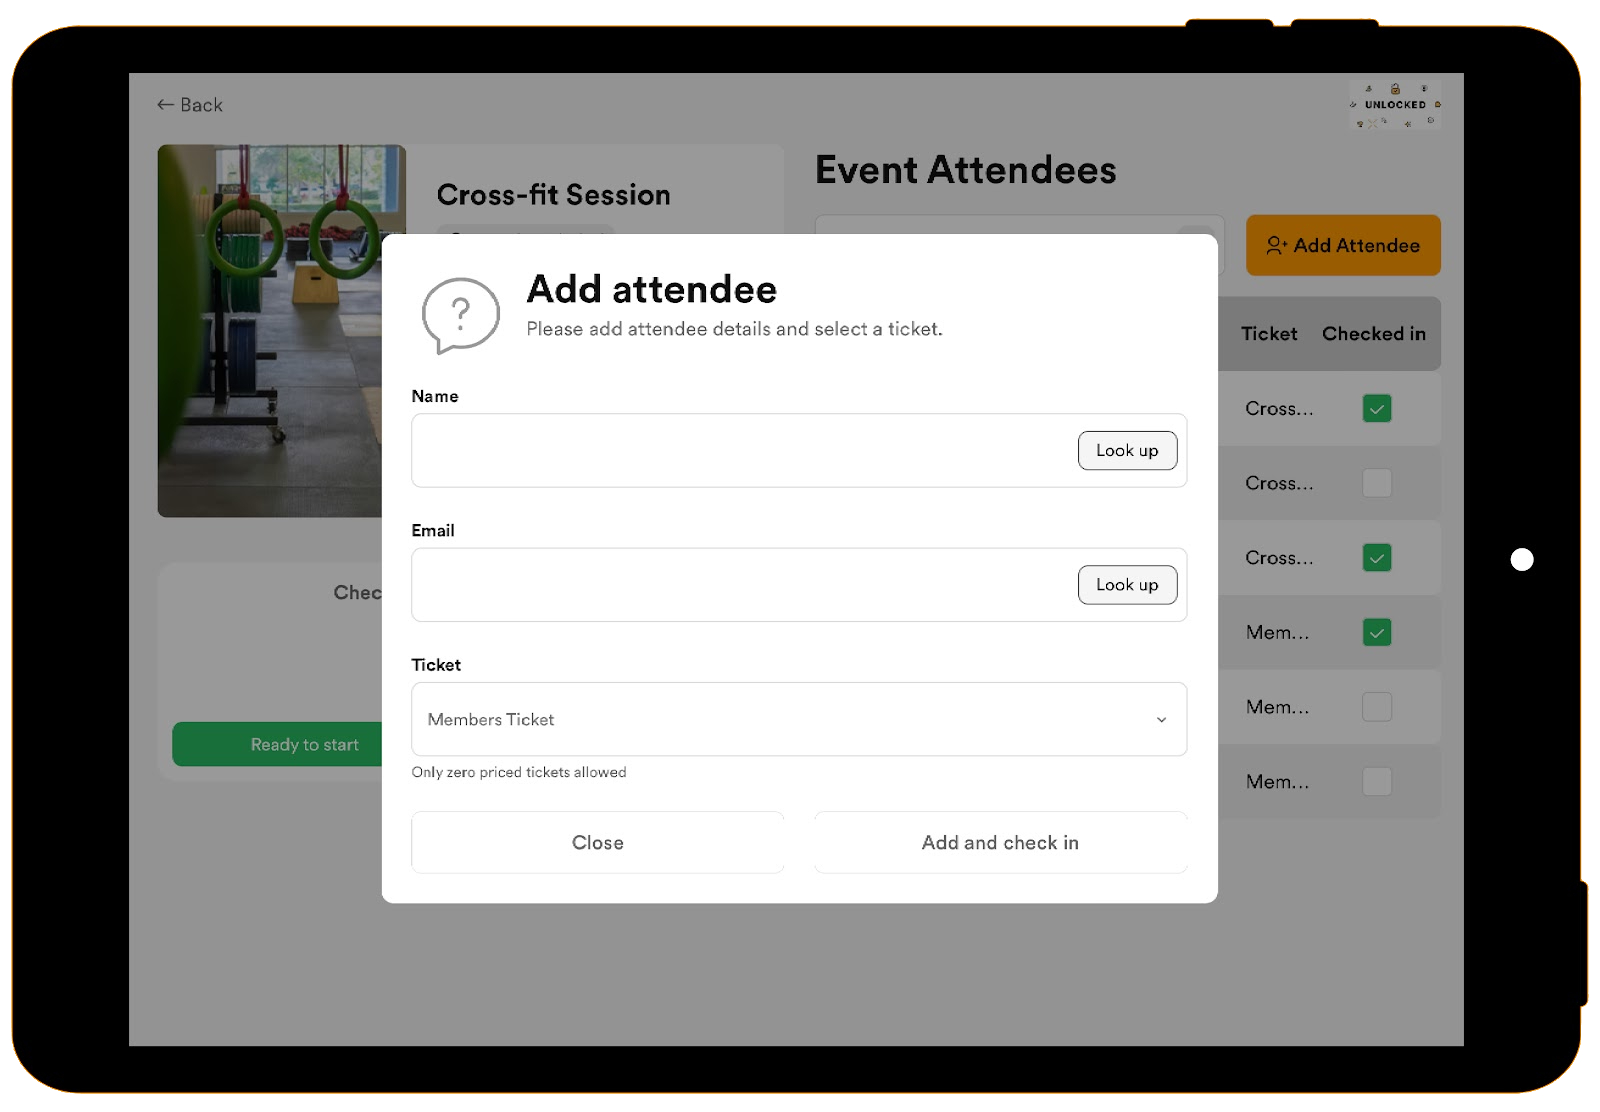
Finally, within the hosted mode, there is the option to add new attendees to the event. This is great for any last-minute additions to the event. This option is only available if the event has some free tickets available.
As the event host, you are then able to type in details, or look up existing customers, to assign the free ticket to the new attendee, and check them into the event at the same time.
Changing mode
One final thing to mention is that only a full unrestricted administrator of the space, is able to change the mode from self service to hosted and vice versa. When selecting the admin options, you will be prompted to enter the email address and password before then being able to change the mode or log out of the app.
Want to know more about
how Nexudus could help your business?
We’re here to answer any questions you have.