NexDelivery v3.0

The NexDelivery app has been redesigned to make it easier for you to register and process deliveries from your phone!
Not only has the user interface been improved, but we’ve added some new functionality which will help with the Virtual Office (VO) feature.
NexDelivery Settings in the Admin Panel
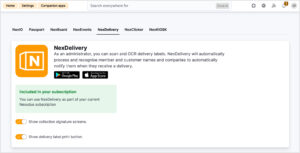
These settings have not changed but it is important to highlight that from the Admin Panel, you can control whether to collect signatures and show the delivery label print button on NexDelivery.
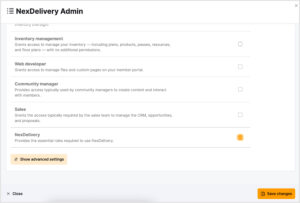
We’ve added a new user role, NexDelivery, to the Admin Panel to allow non-full unrestricted admins to log in and set up the NexDelivery app.
This user role is great if you want to let your staff members set up the NexDelivery app but do not wish to make them full unrestricted admins.
Setting up NexDelivery
Setting up the NexDelivery app is very simple.
- Download the app
- Log in using a full admin email and password
- Select your location
The first time an admin logs in, they will see a Show me around pop-up.
Registering a delivery
Registering a delivery is straightforward. The steps are the same for registering a delivery for a VO customer and a non-VO customer.
- Click + Register a delivery.
- Take a photo of the delivery label.
The system will scan the delivery label and prepopulate the customer information where possible. If no customer is found, simply search for them. - If applicable, click + Additional recipient delivery to register multiple deliveries for the selected customer.
- Select the delivery type: Mail, parcel, checks, publicity or other.
- Enter a delivery note.
- Finally, select one of the three save options:
- Save and register another delivery
- Register and return to delivery list
- Register and print label – If you have a compatible printer, then the label will be printed. If the app cannot connect to a printer, you will see an error message.
The customer will be notified of the delivery via email.
Processing a delivery
Processing a delivery is easy! The steps are slightly different for a VO customer and a non-VO customer. When processing a delivery for a VO customer, you are given additional options, depending on the customer’s delivery handling preference and the plan settings.
Let’s quickly take a look at a non-VO customer.
The first thing is to search for the delivery. You can search by the recipient name, company, and reference number or by scanning the QR code or delivery barcode.
Select a delivery record and then click Mark as collected. Then, if applicable, ask the customer to sign for the delivery and click Mark as collected again.
Let’s take a look at processing a VO customer delivery.
Outlined below are the steps for some of the delivery handling preferences. As an admin, you cannot determine the delivery handling preferences for a delivery, this is determined by the customer. The steps for the other delivery handling preferences are very similar.
The initial steps are the same. Search for the delivery record, select it and click Mark as collected. The next steps are determined by the delivery preference set by the customer. Simply open the delivery and the customer’s delivery preference will be stated.
Open, scan & forward preference
- Click either Scan document or Upload document scan
- Scan document – will open the camera and scan the document on the spot
- Upload document scan – allows you to upload an image file from your device
- If applicable, adjust the additional charge.
- Click Mark as scanned.
You’ll then need to forward the document outside of Nexudus, whether that is emailing the scan or physically sending the mail/parcel to the customer.
- Click Mark as forwarded.
- If applicable, you can add another charge or forward receipt.
- Once you’ve done that, click Mark as forwarded again.
Store for collection preference
- Click Mark as stored.
- If applicable, adjust the additional charge and click Mark as stored again.
- When the parcel is collected, click Mark as collected.
- If the signature setting is enabled, then collect a signature before clicking Mark as collected, again.
- You can add any additional charges before finally clicking Mark as collected.
Deposit Check preference
- Click Mark as deposited.
- If applicable, adjust the additional charge.
- Click Mark as deposited.
Admins can process multiple deliveries at once. All they need to do is click Select, select the deliveries and click Process delivery. The final steps will depend on the delivery type and customer.
Things to note:
As long as the delivery processing hasn’t begun, a customer can change their delivery handling preference on the Members Portal. As an admin, you will be notified of any changes if you have the Virtual Office customer delivery preferences update setting enabled.
If a customer hasn’t set their delivery handling preferences, the system will default to the ‘Store for collection’ preference, regardless of whether you are registering the delivery from the Admin Panel or NexDelivery app.
Want to know more about
how Nexudus could help your business?
We’re here to answer any questions you have.